You will find instructions here on how to install Python and other required files to get started for automating test equipment. We’ll cover the necessary steps to get up and running. Unlike other platforms for controlling test equipment, Python is free and open-source.
First step is to download Python:
Python Download Link from official site or visit the official Python site for 3.11.4: https://www.python.org/downloads/release/python-3114/
Next, run the installer:
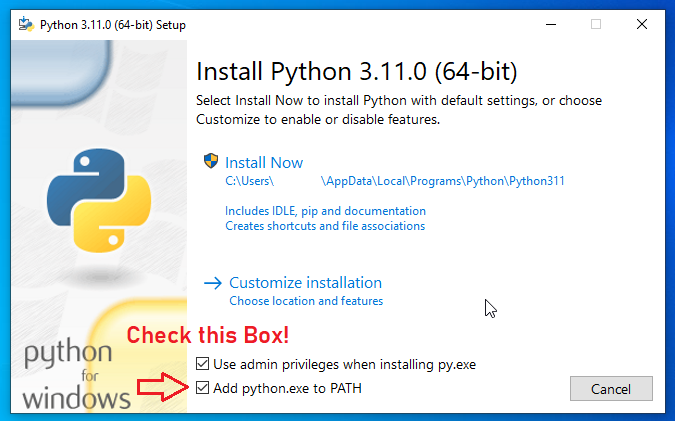
Make sure you add Python to path by checking the box above. Adding Python to ‘PATH’ means that you will be able to run Python without having to navigate to where it’s actually installed on the computer so you will be able to run it in any directory. You’ll see what I mean in the next few steps if this doesn’t make sense to you.
Check installation:
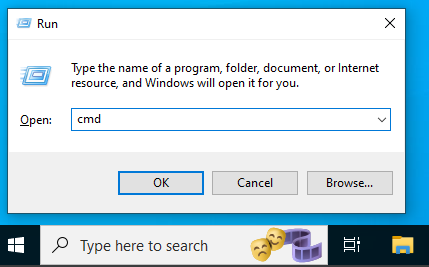
While holding the ‘Windows’ button on the keyboard press the ‘r’ button as well and you should see this box open on the screen.

Type in ‘python’ in the command prompt and hit the ‘enter’ button so you can check the installation.

The python shell should now be activated and you will see the version of Python you are running. This means Python has been installed successfully and running outside of it’s installation directory. Notice that the directory is C:\Users\jerem\ which is not where Python is installed.
Just type in ‘exit()’ and you will exit the python shell since we are done verifying the installation.
Installing Pyvisa:
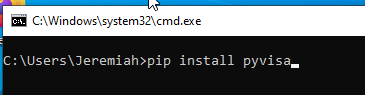
Type in ‘pip install pyvisa’. This will pull the pyvisa library from an online repository and download it into your Python packages. Pyvisa is required for controlling test equipment with various interfaces like GPIB, RS232, USB and LAN.
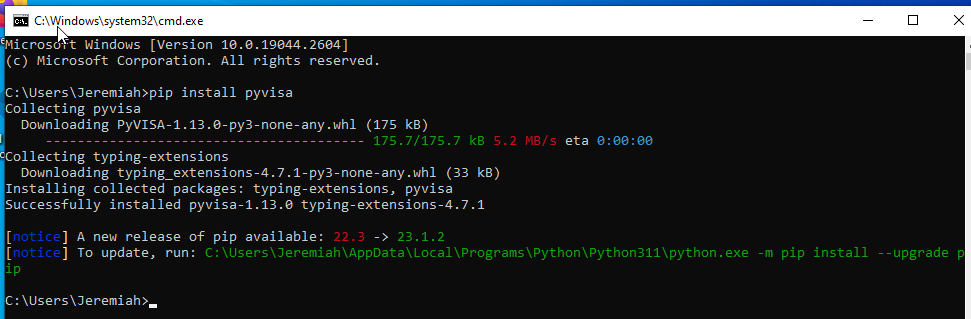
If successful you should see the results above.
You will need to download and install both the NI-VISA and NI-488.2 drivers:
https://www.ni.com/en-us/support/downloads/drivers/download.ni-visa.html#480875
https://www.ni.com/en-us/support/downloads/drivers/download.ni-488-2.html#467646
Finally, download and install an IDE to start writing code. We recommend using Microsoft’s VS Code:
https://code.visualstudio.com/download
You’re ready to start controlling your test equipment! We recommend the NI-USB-GPIB interface for controlling your ATE.